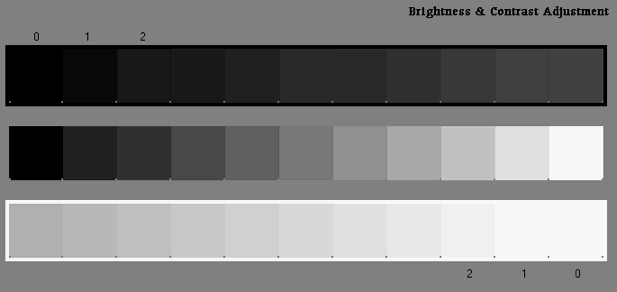
With a properly adjusted monitor, you should be able to distinguish square 1 and 2 from square 0 and the surround for the dark squares at the top and the light squares at the bottom. All the squares in the center grayscale should be distinguishable and the steps should look evenly spaced. If your monitor doesn't meet this criteria, it needs adjustment. Follow these steps:
1. Warm up the monitor for 30-60 minutes. Select subdued room lighting, avoiding reflections of lights or windows on the monitor.
2. Under your operating system's control panel for your Display, select Monitor Gamma (or the equivalent), set all three color channels to 1.00.
3. Adjust the contrast control, usually a half black/half white circle, all the way up.
4. Adjust the brightness control, usually a sun symbol, until you can differentiate the dark squares.
5. If necessary, adjust the contrast control to differentiate the light squares.
6. Mark or note the control positions.
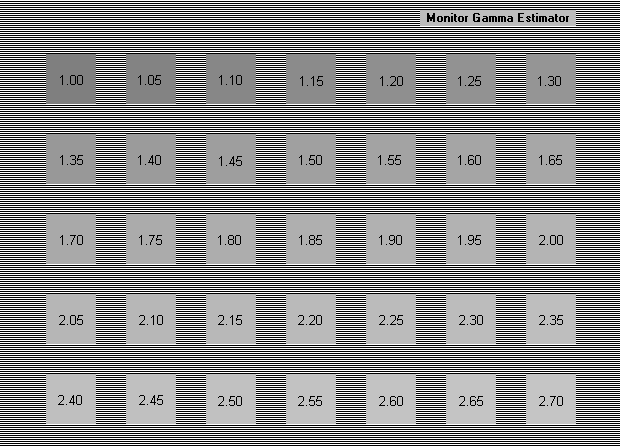
Monitor Gamma Estimator Image
1. Stand facing the screen. Make sure you are far enough away so you can't clearly see the numbers in the squares.
2. Estimate which square best merges with the background and note its position.
3. Check the number in the square. This is the monitor gamma.
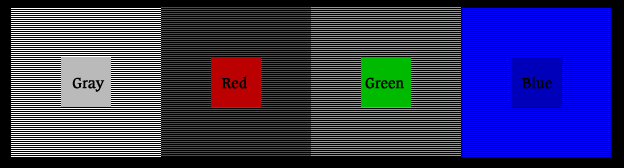
Saturation/Contrast/Gamma Estimator Image
1. Stand facing the screen. Make sure you are far enough away so you can't clearly see the text in the squares.
2. Adjust your colors so that the center square appears the same as the surrounding lined area.
Of course, your best bet to make sure that not only contrast, brightness & gamma are correct, but also that all colors are true to what will be seen on the actual print, is to make sure that your monitor is actually calibrated using an actual monitor calibrator. We use & highly recommend Colorvision's Spyder2 Pro.